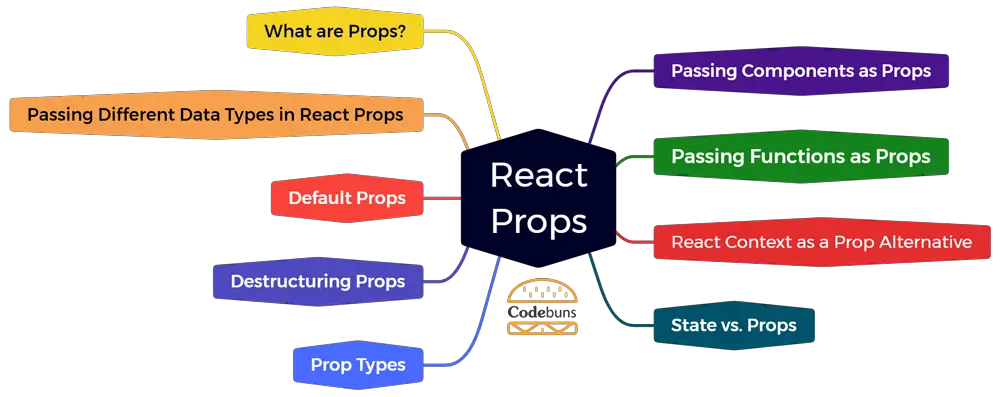
| Table of Contents | |
What are Props?
React components, the foundation of your React applications, often need to share data and customize their behavior. This is where props (short for properties) come into play. Props act as a mechanism for passing data downwards from parent components to their child components. This communication style is referred to as one-way data flow. Here’s a simple example of using props in functional components:
- Props as Function Arguments: When defining a functional component, you can include props as arguments within the parentheses. These arguments represent the data you can receive from parent components.
- Accessing Props within Components: Inside the functional component’s body, you can access the provided props using the
propsobject. You can then reference specific props by their names (e.g.,props.name).
Simple Example of React Props
function Greeting(props) {
    // Accessing the name prop
    const name = props.name;

    return (
        <h1>Hello, {name}!</h1>
    );
}

function App() {
    // Data to pass as a prop
    const userName = "Mark";

    return (
        <div>
            <Greeting name={userName} />  {/* Passing data using props */}
        </div>
    );
}
Explanation
function Greeting(props) {...}: Defines aGreetingcomponent that can accept props (including anameprop).function App() {...}: Defines a parent component,App.const userName = "Mark";: Stores data to be passed as a prop.<Greeting name={userName} />: Renders theGreetingcomponent, passing theuserNamevalue as thenameprop.
Passing Different Data Types in React Props
React props are flexible and can accommodate various data types, allowing you to pass information tailored to your components’ needs. Here’s an overview of common data types you can use with props:
- Basic Types: Strings, numbers, and booleans are all valid prop types. You can use them to pass simple values like names, ages, or true/false flags.
- Complex Data Structures: React props can handle arrays and objects, enabling you to pass more complex data sets. This empowers you to represent lists, user information, or other complex data within your components.
Example
function ProductCard(props) {
    const { name, price, inStock } = props;  // Destructuring props

    return (
        <div>
            <h2>{name}</h2>
            <p>Price: ${price}</p>
            <p>In Stock: {inStock ? "Yes" : "No"}</p>
        </div>
    );
}

function App() {
    const products = [
        { name: "Shirt", price: 25.99, inStock: true },
        { name: "Hat", price: 14.50, inStock: false },
    ];

    return (
        <div>
            {products.map((product) => (
                <ProductCard key={product.name} {...product} />  // Spreading props
            ))}
        </div>
    );
}
Explanation
function ProductCard(props) {...}: Defines aProductCardcomponent.const { name, price, inStock } = props;: Destructuring is used to extract individual props from thepropsobject.- The component displays product details using the received props (
name,price, andinStock). function App() {...}: Defines a parent component (App).- An array of product objects (
products) is created, demonstrating passing complex data as props. <ProductCard key={product.name} {...product} />: RendersProductCardfor each product, spreading props from the product object using{...product}.
Default Props
React props provide a powerful way to customize components. But what happens if a parent component neglects to pass a specific prop value? This is where default props come in. Default props allow you to define fallback values for your props, preventing errors and ensuring consistent behavior even when props are missing.
Example
function Greeting(props) {
    // Destructuring props with a default value
    const name = props.name || "ReactJS";

    return (
        <h1>Hello, {name}!</h1>
    );
}

function App() {
    return (
        <div>
            <Greeting />  {/* No name prop passed */}
        </div>
    );
}
Explanation
function Greeting(props) {...}: Defines aGreetingcomponent.const name = props.name || "ReactJS";: Destructuring is used with a default value. Ifprops.nameis undefined, “ReactJS” is the default name.- This ensures the component renders a greeting even if the
nameprop is missing in theAppcomponent.
Destructuring Props
As you work with more props in your React components, code readability can become a challenge. Destructuring props offers a solution to this. Destructuring allows you to extract specific prop values directly from the props object into individual variables, making your code cleaner and easier to understand.
Example
function UserBadge(props) {
    const { name, isAdmin } = props; // Destructuring props

    return (
        <div className="user-badge">
            {name} - {isAdmin ? "Admin" : "Regular User"}
        </div>
    );
}

function App() {
    return (
        <div>
            <UserBadge name="Mark" isAdmin={true} />
        </div>
    );
}
Explanation
function UserBadge(props) {...}: Defines aUserBadgecomponent.const { name, isAdmin } = props;: Destructuring is used to extractnameandisAdminprops directly into separate variables.- The component displays user information using the destructured props (
nameandisAdmin).
Prop Types
While props offer flexibility in passing data, ensuring that components receive the expected data types is crucial. Prop types come to the rescue here. They are a mechanism for validating the types of props your React components receive during development. This helps catch errors early on, prevent unexpected behavior, and improve the overall stability of your application.
Example
import PropTypes from 'prop-types';

function Greeting(props) {
    const { name } = props;

    return (
        <h1>Hello, {name}!</h1>
    );
}

Greeting.propTypes = {
    name: PropTypes.string.isRequired,  // Specifying prop type
};

function App() {
    return (
        <div>
            <Greeting name="Bob" />  {/* Valid prop */}
            <Greeting name={10} />  {/* Invalid prop (number passed for string) */}
        </div>
    );
}
Explanation
import PropTypes from 'prop-types';: Imports thePropTypeslibrary for prop type validation.Greeting.propTypes = {...}: Defines prop types for theGreetingcomponent.name: PropTypes.string.isRequired: Specifies that thenameprop should be a string and is required.- In the
Appcomponent, the second<Greeting>will trigger a warning in development mode because it passes a number instead of a string, helping identify potential issues early on.
Passing Components as Props
React components helps reusability. But what if you need to incorporate another component within a component’s structure? This is where passing components as props become a valuable technique. Treating components as props allows you to use their functionality and UI within other components. This promotes code reusability, simplifies complex layouts, and improves overall code organization.
Example
function Button(props) {
    return <button>{props.text}</button>;
}

function UserCard(props) {
    return (
        <div className="user-card">
            <h2>{props.name}</h2>
            <Button text="View Details" />  {/* Passing Button component as a prop */}
        </div>
    );
}

function App() {
    return (
        <div>
            <UserCard name="Alice" />
        </div>
    );
}
Explanation
function Button(props) {...}: Defines a reusableButtoncomponent.function UserCard(props) {...}: Defines aUserCardcomponent.<Button text="View Details" />: TheButtoncomponent is passed as a prop (textprop for content) to theUserCardcomponent.- This allows the
UserCardto include the button within its UI structure.
Passing Functions as Props
React components are often interactive, responding to user actions. But how do you trigger actions within a child component from its parent? Here’s where passing functions as props comes in. This powerful technique allows you to send functions from parent components to child components as props. The child component can then invoke the received function to perform specific actions, enabling communication and fostering interactivity within your application.
Example
function Button(props) {
    return <button onClick={props.onClick}>Click Me</button>;
}

function App() {
    const handleClick = () => {
        console.log("Button clicked!");
    };

    return (
        <div>
            <Button onClick={handleClick} />  {/* Passing handleClick function as a prop */}
        </div>
    );
}
Explanation
function Button(props) {...}: Defines aButtoncomponent that accepts anonClickprop (function for click handling).function App() {...}: Defines anAppcomponent.const handleClick = () => {...}: Defines a functionhandleClickto handle button clicks.<Button onClick={handleClick} />: Passes thehandleClickfunction as theonClickprop to theButtoncomponent.- When the button is clicked, it triggers the
onClickfunction (which ishandleClickin this case), demonstrating communication between components.
React Context as a Prop Alternative
While props are a foundation of communication in React, complex applications can lead to a situation known as “prop drilling.” This occurs when data needs to be passed down through many nested components, making the component hierarchy cumbersome and hard to maintain. React Context offers an alternative solution for managing such data.
Context allows you to create a global state provider that can be accessed by any component in the React tree, regardless of its depth in the hierarchy. This eliminates the need to repeatedly pass data through props, promoting cleaner code structure and improved maintainability.
Important Note: Context is typically used for data that needs to be shared across a significant portion of your application. For smaller data sets or communication between directly nested components, props are generally preferred due to their simplicity.
Prop Drilling Example
Imagine you’re building a shopping cart application. At the top of your component hierarchy, you have a Cart component that needs to display the total number of items in the cart. This data might originate from a deeply nested component responsible for managing the cart items.
To achieve this using props, you must pass the totalItems prop down through every nested component in the hierarchy between the Cart and item management components. This can become tedious and hard to manage, especially as your component tree grows.
React Context Example
Here’s how React Context can solve this issue:
1. Create a Context
import React, { createContext, useState, useContext } from 'react';

const CartContext = createContext({
    totalItems: 0,
    setTotalItems: () => { },
});
This code creates a context named CartContext with initial state for totalItems and a function to update it (setTotalItems).
2. Wrap Your App with the Provider
function App() {
    const [totalItems, setTotalItems] = useState(0);

    const value = { totalItems, setTotalItems };

    return (
        <CartContext.Provider value={value}>
            {/* Your application components here */}
        </CartContext.Provider>
    );
}
The App component becomes the provider for the CartContext. It holds the state (totalItems) and provides a way to update it (setTotalItems). We wrap all our application components with the CartContext.Provider to make the context accessible throughout the tree.
3. Consume the Context in the Cart Component
function Cart() {
    const context = useContext(CartContext);

    return (
        <div>
            Total Items: {context.totalItems}
        </div>
    );
}
The Cart component can now access the totalItems and setTotalItems functions directly from the context, regardless of its position in the hierarchy. This eliminates the need for prop drilling.
React Context provides a centralized way to manage shared state, avoiding the need to pass data through numerous props. This keeps your component structure cleaner and easier to maintain, especially in complex applications.
State vs. Props
React components rely on props and state to function effectively but serve distinct purposes. Here’s a breakdown of the key differences:
- Data Source: Props act as an external communication channel, receiving data downwards from parent components. State, on the other hand, manages internal data specific to the component itself.
- Mutability: Props are generally considered immutable, meaning their values shouldn’t be modified within the receiving component. State, however, is mutable, allowing you to update its values based on user interactions or other events.
- Purpose: Props are ideal for customizing components and sharing data between them. State excels at managing dynamic data within a component that might change over time.
Choosing Between Props and State:
- Use props when data originates from a parent component and needs to be reflected in the child component’s behavior or UI.
- Use state when data is specific to a component and needs to be updated based on user interactions or internal logic.
Scenario: Building a simple counter component with an increment button.
Using Props
1. Parent Component (App)
function App() {
    const initialCount = 0; // Initial value for the counter

    return (
        <div>
            <Counter count={initialCount} />  {/* Pass initial count as a prop */}
        </div>
    );
}
2. Counter Component
function Counter(props) {
    const { count } = props; // Access the count prop

    return (
        <div>
            Count: {count}
        </div>
    );
}
Explanation
In this example, the counter component receives the initial count value from the parent component (App) as a prop (count). The counter component itself cannot modify this prop (immutable), it can only display the provided value.
Using State
1. Counter Component
function Counter() {
    const [count, setCount] = useState(0); // Manage count state

    const handleIncrement = () => {
        setCount(count + 1); // Update state using setCount
    };

    return (
        <div>
            Count: {count}
            <button onClick={handleIncrement}>Increment</button>
        </div>
    );
}
Explanation
Here, the counter component manages its own internal state using the useState hook. The count state variable holds the current count value, and the setCount function allows us to update it. The handleIncrement function demonstrates how to modify the state based on user interaction (button click).
Conclusion
React Props provide the foundation for building reusable and customizable React components. They are the bridge between parent and child components in React’s one-way data flow. You can create well-structured and predictable components by understanding how to define props, use them within components, set default values, and ensure correct data types with prop types. Passing functions and other components as props open up possibilities for dynamic and interactive user interfaces in React applications. As your React development skills progress, mastering props will be essential for building larger and more complex UIs.