In this article, I will walk you through how to deploy and configure WordPress on a local development server. One of the popular options among PHP developers and designers is WAMP. A collection of open-source components commonly used in a Web server environment. Let’s get started.
I am gonna do it in 3 simple steps.
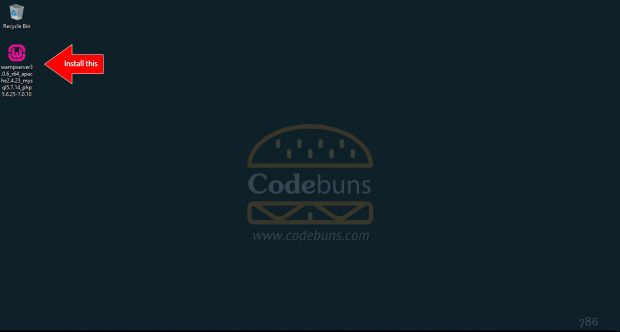
Step #1. Download and Setup WAMP (http://www.wampserver.com/en/)
Step #2. Create MySQL database for WordPress Installation
Step #3. Download, Configure, and Install WordPress
What is WAMP?
- Also called WampServer.
- Easy to install Software stack of Apache, Mysql, and PHP on windows.
- Free, lightweight solution to create a local webserver environment for development and testing purpose only.
Popular Local Server Options
Listed below are the most popular options for creating a local server environment. All the required components are bundled together in single application packages that can host multiple WordPress installations quickly and painlessly.
XAMPP (Windows)
WAMP (Windows)
MAMP (Mac)
DesktopServer (Windows & Mac)
AMPPS (Windows, MAC, and Linux)
Common Errors
You may encounter these errors while starting the WAMP Server. Click on the error to read the solution.
Missing VCRUNTIME140.dll and/or MSVCR110.dll
Port 80 used by another Service
Step #1: Download and Setup WAMP
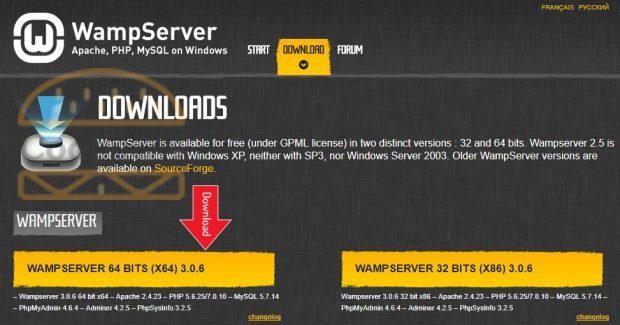
To get started, head over to http://www.wampserver.com/en/ website to download windows installer file. Here, you have two options to choose from. WAMPServer comes in two different varieties depending on the operating system. This can be 64Bit or 32Bit. Just download 32Bit, if you are not sure.
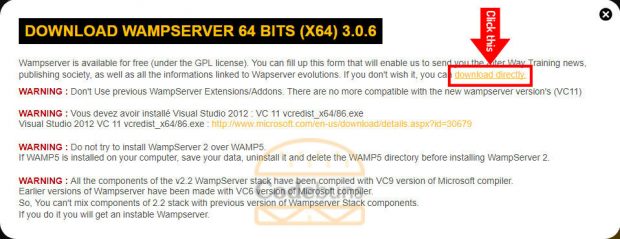
Popup window will open. You can read all the information here if you like.
Click on the link to start the download. The file is around 209 MB, so it will take a little bit to download.
Once the download is complete, double click the executable (.exe) file to launch the WAMP installer.
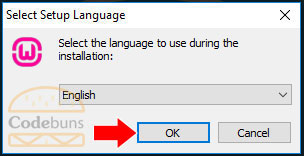
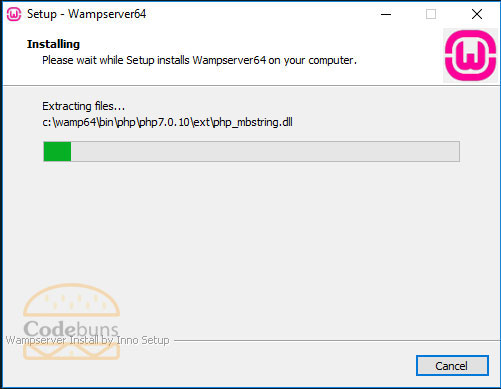
Proceed through the installation process which is pretty trivial. Just accept the default settings and you will have a local web server up and running in no time. Click OK to go to next screen.
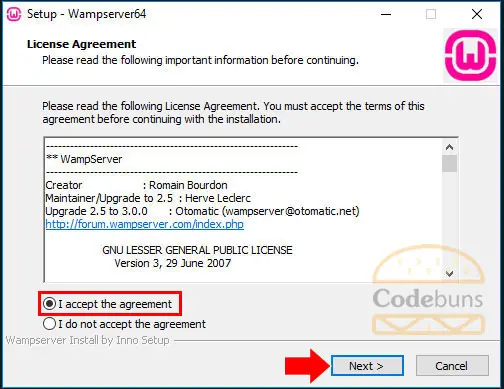
Right here, accept the terms of use. Click NEXT.
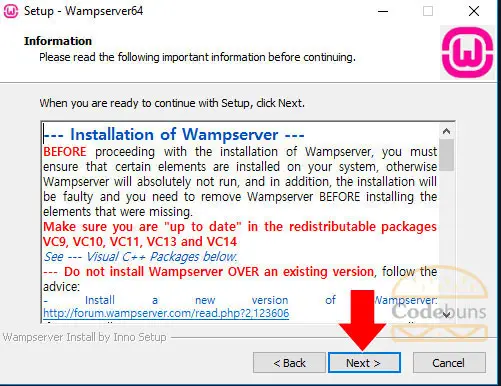
Read the information and click NEXT.
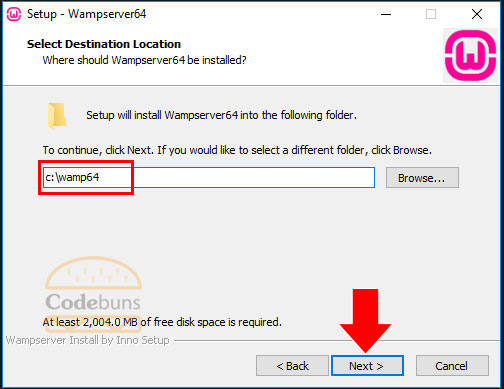
Next step is to select a folder where you want to install WAMP Server. The default location is c:\wamp64. However, you can change the directory name and installation path here. I would recommend default settings. Click NEXT.
This will create start menu and desktop icon with this name. Click NEXT.
![]()
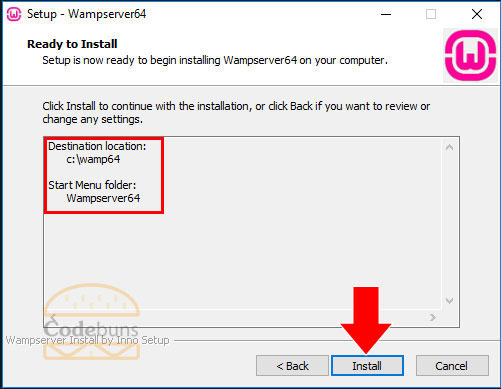
Setup is now ready to begin installation on your computer. Click INSTALL.
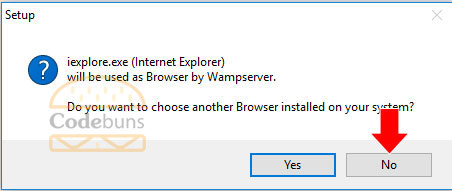
WAMP needs to use the browser and by default internet explorer is selected. If you want to choose another browser like Google Chrome or Mozilla Firefox then click YES otherwise select NO. Again NO on the next screen.
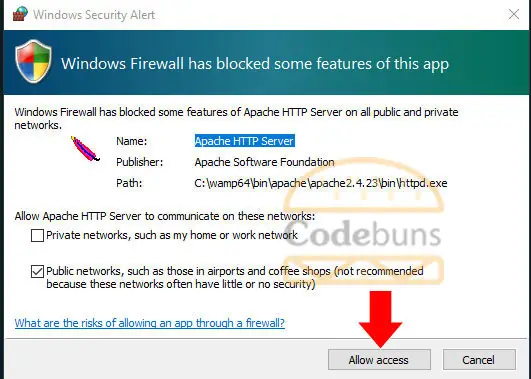
If you get a firewall message, allow that program to get through.
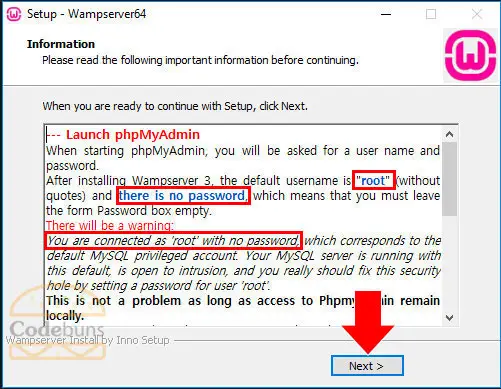
Read the information carefully. In order to login phpMyAdmin interface to manage MySQL databases, you need to enter root as username and a blank password. That’s clearly written in the below screenshot. Click NEXT to continue further.
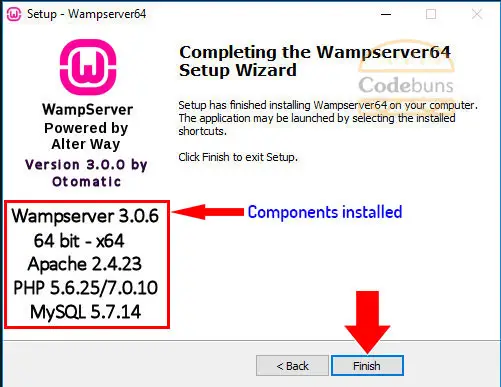
You can see all the components and their version installed successfully. This is called AMP stack which is Apache, MySQL, and PHP. Click FINISH to exit the installation process.
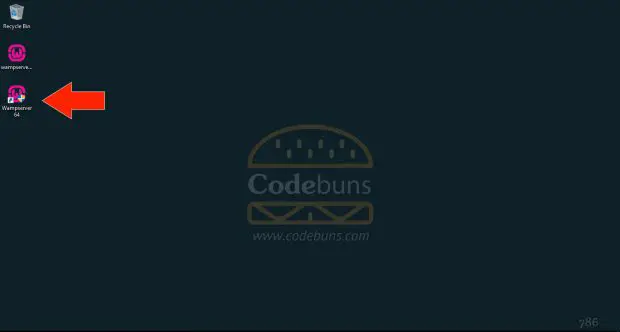
After going through all the installation steps, WAMP is now ready to use. You can see the program’s shortcut on the desktop. Just double click the icon to launch the WAMPServer.
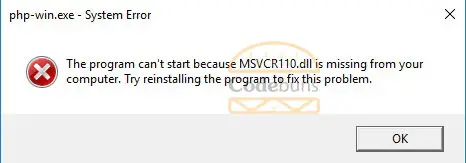
Note: While starting the server, you can come across Missing DLL error.
This means you won’t be able to start the WAMPServer. Read the article “How to fix missing DLL error for WAMP”.
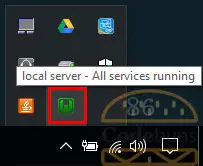
When WAMP is running, you can see the green icon in

the system tray as shown in the screenshot below. When it turns from red, orange and then finally green
that means all the services are up and running.
Status of the WAMP icon is of 3 colors.

Offline, none of the services running (MySQL and Apache)

One of the service not running (MySQL or Apache)
All the services running (MySQL and Apache)
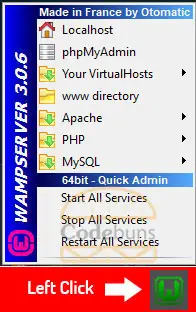
You can start, stop and restart the services from the main menu by left clicking on the WAMP icon in the system tray. Apache, MySQL, and PHP can be managed from this menu.
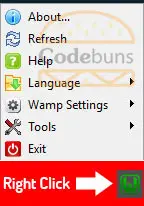
Right click will display another menu with options like wamp settings, Tools, Language, Exit, etc.
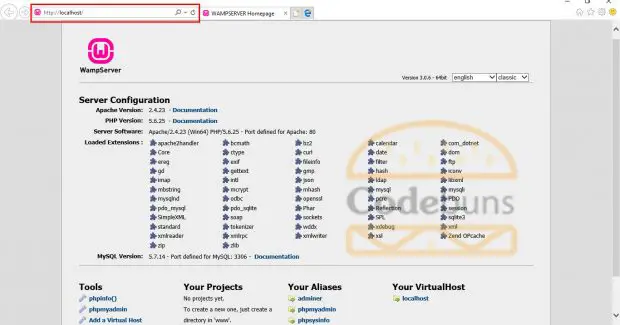
You can access the web server information page just by entering http://127.0.0.1 or http://localhost in the browser of your choice. Another option is to left click this icon
and select Localhost at the top. If you see welcome screen with server configuration that means everything is working fine and you are good to go 😉
Step #2: Create MySQL database for WordPress Installation
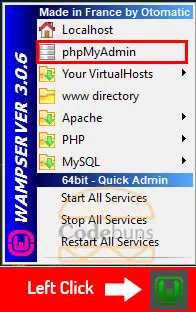
Before installing WordPress, you need to create a blank MySQL database. Left click on this icon [pinterest-image message=”WAMPSERVER green icon” image=”https://codebuns.com/wp-content/uploads/2017/09/green.jpg”]
in the system tray and select phpMyAdmin. You can also type http://localhost/phpmyadmin in the browser to directly go to the admin page.
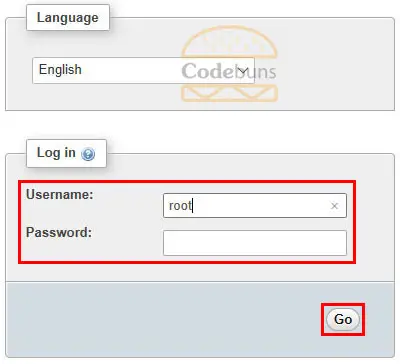
This will take you to the login screen. If you remember, I mentioned root as username and blank password during the WAMP installation process. Use the info here and click GO.
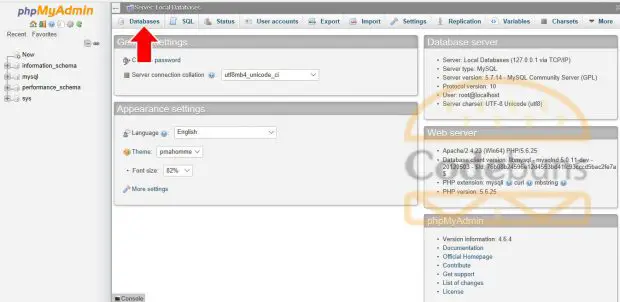
Once logged in, a phpMyAdmin page will appear. See the screenshot below. This is basically a web-based user interface to manage MySQL databases. From here, go to the databases tab on the top-left to create a new database.
Enter unique database name here. I’m gonna call it codebuns_db but you can enter whatever you like. Click CREATE.
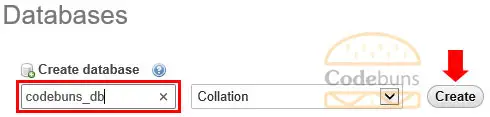
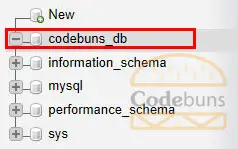
A message will appear to confirm that the database has been created. You can see codebuns_db listed in the database tree on the left side of the page. It’s completely blank at this time. There are no tables, nothing at the moment.
Database creation is complete now. Let’s move forward and install WordPress.
Step #3: Download, Configure, and Install WordPress
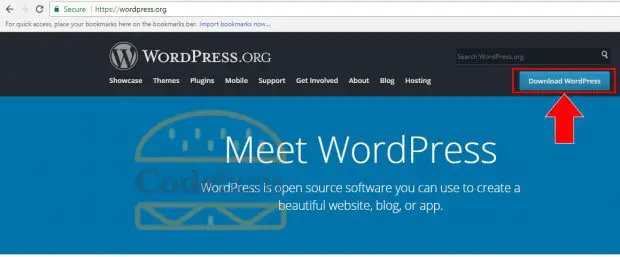
In order to install WordPress locally, you need to download it. Open your browser and go to wordpress.org. This is the official WordPress website. Up on the right-hand side, you can see the download WordPress button. This will take you to the next screen.
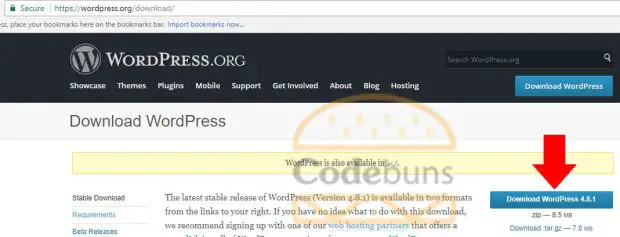
You can directly go to this page just by typing wordpress.org/download. Make sure to download the latest version which is on the right-hand side of the page. Click to download a zip file which is around 8.5MB. If you want to download the older version of WordPress due to any reason then click Release Archive link on the left side.
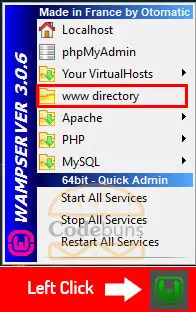
Now left click on WAMP icon in the system tray and select WWW directory.
All you need to do is, extract the contents of ZIP file into C:\wamp64\www directory and you get a new folder called ‘WordPress’. Rename the folder anything you like because this is going to be your default WordPress home directory.
This is the complete folder structure C:\wamp64\www\wordpress as you can see in the screenshot below.
Note: You can work on multiple sites just by creating a new folder in WWW directory and copying WordPress files in it.

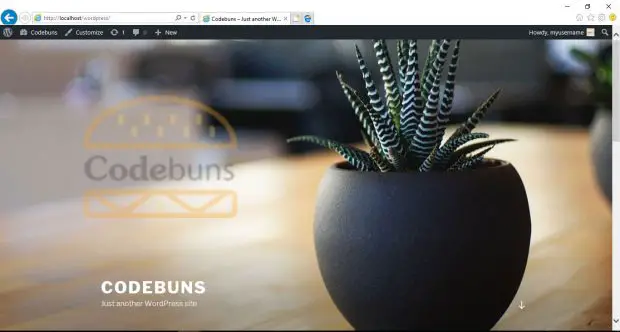
To serve the directory through WAMP, all you need to do is open your browser and type LocalHost forward slash your home directory name like this http://localhost/wordpress to start the installation and configuration of WordPress.
Let’s quickly go through the steps.
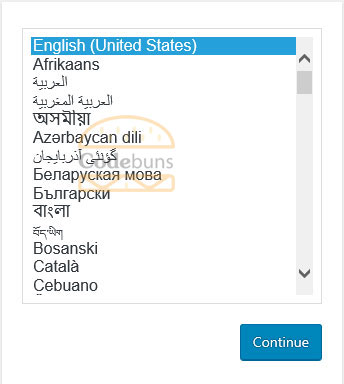
Choose the appropriate language for installation and click CONTINUE.
Read the information below which is required to connect to the database.
Click LET’S GO!

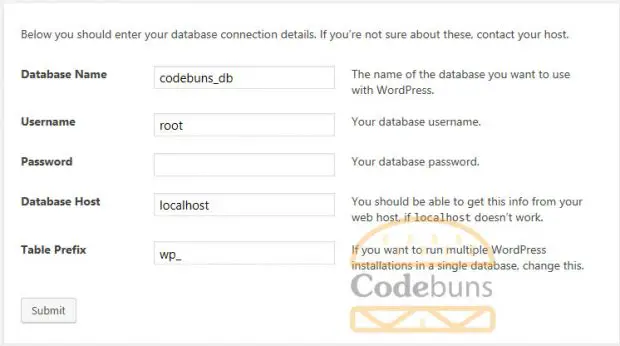
Let’s enter login details for your database created earlier.
Database Name: codebuns_db
Username: root
Password:
Database Host: localhost
Table Prefix: whatever_enter_here_
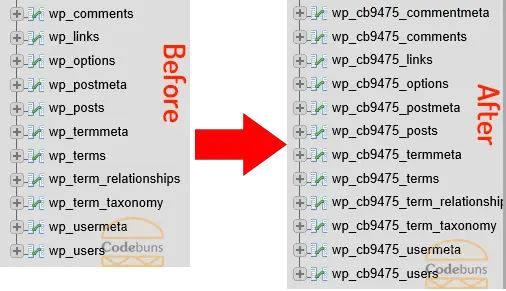
If your site is hosted on the internet, it is better to change database table prefix to something unique for security reasons like this wp_cb9475_. But for local development default prefix is fine. Below are the database tables before and after prefix change.
Once all the required information is entered then click SUBMIT. This action will add new configuration file called “wp-config.php” in the root of your WordPress home directory. The file contains connection information which is used to communicate with the database to store and retrieve data.
If database details are correct, you will be taken to this screen. Click RUN THE INSTALL button.

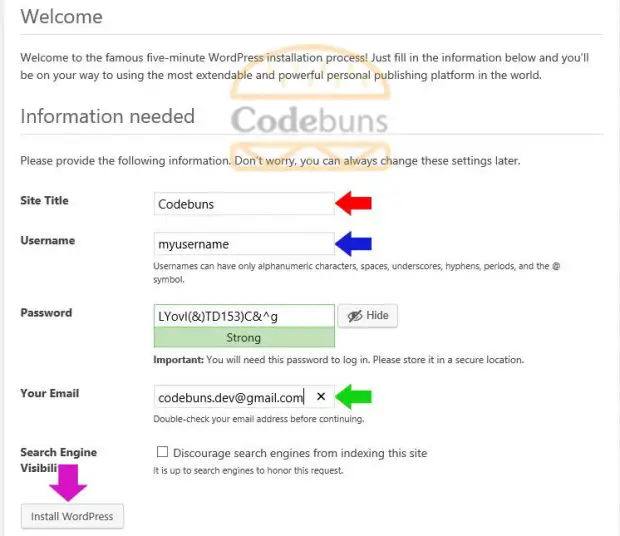
At this step, you need to fill in the information like site title, username, password (better use auto), email, etc. This is the basic info to setup a site and access admin panel later. Enter all the required details and press INSTALL WORDPRESS which then create database tables for your WordPress website.
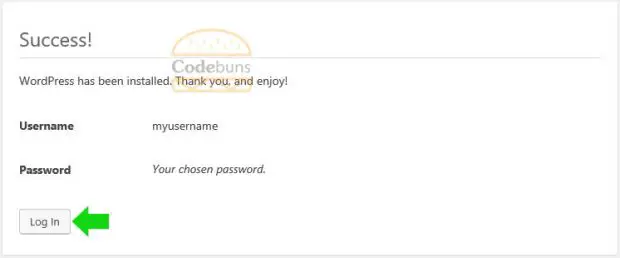
Congratulations, you have successfully installed WordPress locally on your machine. Now you are ready to publish your contents. Click LOG IN.
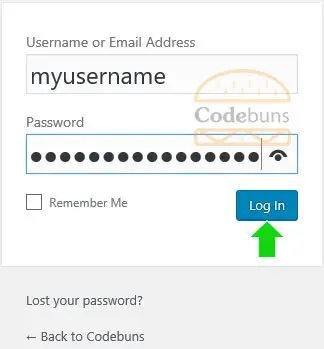
It will take you to the login page. Enter username and password, we created in the last step.
Once logged in, the first screen you’ll see is the WordPress admin dashboard. This provides access to all the management tools for your website like appearance, plugins, posts or pages and much more.
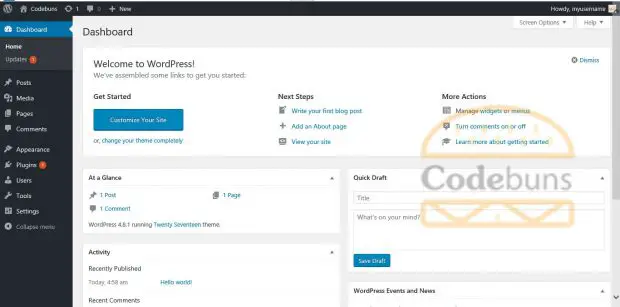
Finally, this is your new WordPress website up and running on WAMP.